Are you looking to cancel your Photobucket subscription but don’t know where to start? You’re not alone.
Many users find the process confusing or worry about losing their precious photos. The good news is, canceling your subscription and even deleting your account can be straightforward if you follow the right steps. In this guide, you’ll discover exactly how to cancel your Photobucket subscription quickly and safely—so you can stop unwanted charges and take control of your account.
Keep reading to avoid common mistakes and learn important tips to protect your photos before you say goodbye.
Accessing Your Photobucket Account
To cancel your Photobucket subscription, start by logging into your account. Accessing your account is the first step in managing your subscription and settings.
Photobucket’s website allows you to easily reach your account dashboard. This area holds all your subscription details and options to cancel.
Logging Into Photobucket
Go to the official Photobucket website using a web browser. Enter your username or email and password on the login page. Make sure your credentials are correct to avoid login errors.
Finding Your Account Settings
After logging in, locate the account menu at the top right corner. Click on your profile icon or name to open a dropdown menu. Select “My Account” from the list to access your settings.
Using Mobile Browsers To Access Your Account
If you use a mobile device, tap the menu icon first. This icon usually looks like three horizontal lines. From the menu, choose “My Account” to view your subscription options.

Credit: mygoodtrust.com
Locating Subscription Settings
Finding the subscription settings on Photobucket is the first step to cancel your plan. The settings control your membership and billing details. You must access these settings to manage or stop your subscription.
The process is simple but varies slightly between desktop and mobile. Knowing where to look saves time and frustration. This guide walks you through locating your subscription settings easily.
Logging Into Your Photobucket Account
Start by opening the Photobucket website on your browser. Enter your username and password to log in. Make sure you use the correct credentials to access your account dashboard.
Accessing The Account Or Profile Menu
After logging in, look for your profile icon or name. This is usually at the top right corner of the page. Click on it to open a dropdown menu with account options.
Finding The Membership Or Subscription Tab
In the dropdown menu, find the option labeled “My Account” or “Account Settings.” Click on it to open your personal account page. Within this page, search for the “Membership” or “Subscription” tab. This is where Photobucket stores all billing and plan information.
Steps To Cancel Your Subscription
Cancelling a Photobucket subscription involves clear, simple steps. Follow these carefully to stop your paid plan without issues.
It is important to cancel the subscription before deleting your account. This avoids unexpected charges or service interruptions.
Log In To Your Photobucket Account
Start by visiting the Photobucket website. Enter your username and password to access your account dashboard.
Navigate To Account Settings
Once logged in, find the “My Account” section. On mobile, tap the menu icon first to see this option.
Access The Membership Tab
Inside account settings, locate the Membership tab. This area controls your subscription details and payment plans.
Cancel Your Subscription
Click on “Cancel Subscription” under the Membership tab. Follow the prompts to confirm your cancellation.
Confirm Cancellation
After clicking cancel, a confirmation page appears. Confirm your choice to stop the subscription immediately.
Confirming Your Cancellation
After canceling your Photobucket subscription, check your email for a confirmation message. This ensures your cancellation was successful and avoids unexpected charges. Keep this confirmation for your records.
Check For Confirmation Email
After you cancel your Photobucket subscription, watch for a confirmation email. This email proves your cancellation went through. Keep it safe for future reference. If no email arrives within 24 hours, check your spam folder. Contact Photobucket support if you still don’t see it.
Verify Subscription Status Online
Log back into your Photobucket account. Visit the Membership or Subscription section. Confirm the status shows “Canceled” or “Inactive.” This update means your subscription will not renew. If it still shows active, repeat the cancellation steps or reach out to support.
Save Important Account Information
Before finalizing, save any important account details. Download your photos and data. Cancellation does not always delete your files immediately. Keeping backups prevents data loss. This step ensures you keep memories even after cancellation.
Downloading Your Photos Before Cancellation
Saving your photos is an important step before canceling your Photobucket subscription. Once you cancel, you may lose access to your images and videos.
Downloading ensures you keep all your memories safe on your device. It prevents any accidental loss of valuable photos.
First, log in to your Photobucket account on the website. Use a desktop or mobile browser for easier navigation.
Locate the section called “My Account” or “Account Settings.” This is where you manage your photos and subscription.
Selecting Photos To Download
Go to your photo albums or library. Choose the images and videos you want to save.
You can download photos one by one or select entire albums. Check the file size and storage space on your device.
Downloading Photos To Your Device
Click the download button or option near your selected photos. Files will save to your computer or phone.
For many images, Photobucket may offer a zip file download. Extract the zip file to access all photos easily.
Requesting A Download Link
If you have many files, Photobucket can send a download link via email. This link contains all your photos in one place.
To request the link, visit the Photobucket support or account deletion page. Follow the instructions to receive your files safely.
Deleting Your Photobucket Account
Deleting your Photobucket account removes all your photos and videos permanently. This action cannot be undone. Follow clear steps to make sure you do it right. Back up your files before starting the deletion process. This keeps your memories safe outside Photobucket.
Log In And Access Account Settings
First, log in to your Photobucket account on the website. On a desktop, find the “My Account” section. On a mobile browser, tap the menu icon to locate it. This area controls your subscription and account details.
Cancel Any Paid Subscription
Before deleting your account, cancel any active paid plans. Go to the Membership tab under Account Settings. Click on “Cancel Subscription” and confirm the cancellation. This step avoids extra charges after deletion.
Start The Account Deletion Process
After canceling subscriptions, navigate to the account deletion page. This is often found in the support or account settings section. Follow the instructions carefully. You may need to verify your identity with your email or username.
Download Your Photos
Downloading your photos is important before deletion. Use the download link option during the deletion steps or request one from support. This saves your images so you do not lose them permanently.
Understand The Effects Of Deletion
Deleting your Photobucket account permanently removes all content. Your photos and videos will no longer be accessible. It may take time for images to disappear from search engines. Submit a removal request to speed up this process if needed.
Contact Support For Help
You can contact Photobucket’s Member Engagement Team for assistance. They help with account deletion or canceling a deletion request. Support is useful if you face any issues during the process.
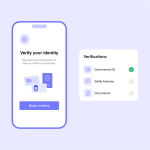
Verification Process For Account Deletion
Account deletion requires identity verification to protect your data. You may need to enter your username, email, and postal code. This step ensures only the rightful owner can cancel the Photobucket subscription and delete the account safely.
Understanding The Verification Process
Photobucket requires a verification step to delete an account. This step ensures the request comes from the account owner. It protects your photos and personal data from accidental deletion.
You need to provide specific information to confirm your identity. This makes the deletion process secure and reliable.
Information Needed For Verification
Prepare your username and email linked to the account. Photobucket may also ask for your postal code. These details help verify your ownership of the account.
Having this information ready speeds up the process. It reduces the chance of delays or errors during verification.
How To Complete Verification
Start the deletion process by logging in to your Photobucket account. Go to the account settings or support page. Follow the prompts to enter your verification details.
If needed, contact the Member Engagement Team for help. They can guide you through the verification and deletion steps. This support ensures you complete the process smoothly.
Contacting Support For Assistance
Contacting support can make canceling your Photobucket subscription easier. The support team guides you through the process. They answer questions and help with any issues. Reaching out ensures you do not miss important steps.
Support can assist with account cancellation and data concerns. They provide clear instructions tailored to your situation. You may need help with subscription verification or technical problems. Their help speeds up the cancellation process.
How To Reach Photobucket Support
Start by visiting the Photobucket website. Scroll to the bottom and find the “Support” or “Help” link. You can also access support through the account settings page. Photobucket offers email and contact forms for assistance.
What Information To Provide
Prepare your account details before contacting support. Include your username and the email linked to your account. Mention your subscription plan and cancellation request clearly. This helps the team respond faster and more accurately.
Expected Response Time From Support
Photobucket usually replies within one to three business days. Response times may vary during busy periods. Keep an eye on your email inbox and spam folder. If you do not hear back, consider sending a follow-up message.
Handling Subscription Charges After Cancellation
Canceling your Photobucket subscription stops future payments. Charges already made may still appear on your billing statement. Understanding what happens after cancellation helps avoid surprises.
Photobucket usually allows access to paid features until the current billing cycle ends. This means you keep benefits for the time you paid. After that, your account reverts to the free plan automatically.
When Will Charges Stop?
Charges stop at the end of the current subscription period. If you cancel mid-cycle, you still get access until the period expires. No new charges occur after that date.
Refund Policy For Photobucket
Photobucket rarely offers refunds for canceled subscriptions. Payments are typically non-refundable once processed. Check your payment method for any specific refund rules.
Checking Your Billing Statements
Monitor your bank or credit card statements after cancellation. Make sure no extra charges appear. Contact Photobucket support immediately if you see unexpected fees.
Contacting Photobucket Support
Use Photobucket’s Member Engagement Team for billing questions. Provide your account details clearly. They can explain charges and help resolve billing issues.

Credit: www.reddit.com
Removing Your Photos From Search Engines
Start by canceling your Photobucket subscription in the Membership tab of your account settings. After cancellation, follow prompts to delete your account, but download your photos first to avoid losing them. Keep in mind, search engines may take time to remove your images.
Understanding Search Engine Indexing Of Your Photos
Photos uploaded to Photobucket can appear in search results. Search engines like Google save copies of your images. These images stay visible even after deletion from Photobucket. This happens because search engines keep cached versions. Removing your photos from search engines requires extra steps.
Requesting Removal Of Images From Google
Google allows you to request image removal. Use the Google Search Console or Removal Tool. Enter the exact URL of the photo you want removed. Google reviews your request and may take days to act. This speeds up the removal process from search results.
Using Robots.txt And Meta Tags To Control Indexing
Photobucket controls indexing through robots.txt files and meta tags. Unfortunately, users cannot change these settings on Photobucket. This limits your control over search engine crawling. Deleting the photo from Photobucket stops new indexing but not old cached images.
Checking Search Results After Account Deletion
After canceling your subscription and deleting your account, wait a few weeks. Search engines take time to update their indexes. Regularly check image search results for your photos. If images still appear, submit removal requests again. Persistence helps clear your photos from search results.

Credit: support.photobucket.com
Frequently Asked Questions
How Do You Delete Your Photobucket Account?
Log in to your Photobucket account and cancel any paid subscription first. Then, go to Account Settings and select “Delete this account. ” Follow the prompts and verify your details to complete deletion. Download your photos before deleting, as removal is permanent and irreversible.
What Is The Controversy With Photobucket?
Photobucket faced controversy for using user photos without consent and forcing privacy policy acceptance to delete accounts. It mishandled sensitive data and violated privacy laws in several states.
How Do I Stop Getting Charged For Subscriptions?
Cancel your subscription directly on the service’s website or app. Contact customer support if needed. Request a stop payment from your bank for ongoing charges.
How Do I Get My Photos Off Photobucket?
Log in to Photobucket and download your photos. Cancel any paid subscription in Account Settings. Then, start the account deletion process to remove your photos permanently.
How Do I Cancel My Photobucket Subscription?
Log in, go to My Account, select Membership, and click Cancel Subscription. Confirm to cancel.
Can I Delete My Photobucket Account After Cancellation?
Yes, cancel your paid plan first, then follow the account deletion steps in settings.
Will My Photos Be Deleted After Canceling Subscription?
Photos remain until you delete your account; canceling subscription stops payments only.
How Can I Download Photos Before Deleting Photobucket Account?
Request a download link via Photobucket support before starting account deletion.
Is Photobucket Account Deletion Permanent?
Yes, deleting your account removes all photos and videos permanently.
How Long Does Photobucket Take To Delete My Data?
Account deletion is immediate, but search engines may take longer to remove images.
Conclusion
Canceling your Photobucket subscription is simple and quick. First, log in to your account and go to Membership settings. Next, click “Cancel Subscription” and confirm your choice. Remember to download all your photos before deleting your account. Account deletion is permanent and removes all your images and videos.
It may take time for search engines to clear your pictures. For help, contact Photobucket’s support team anytime. Stay informed and act carefully to keep your data safe.