Minecraft is a game that gives players incredible freedom to build, explore, and create. One powerful tool hidden in its commands is the spawner command. With it, you can place custom mob spawners almost anywhere, control what mobs appear, and even set special properties. While many players know basic commands, few understand how deep and flexible the spawner command can be. If you want to master custom mobs, adventure maps, or creative builds, learning this command unlocks new possibilities.
The Minecraft spawner command is not just for experts—it’s a tool anyone can use with a bit of guidance. This article will break down everything you need to know. We’ll cover how spawners work, the exact command syntax, how to change mob types, and how to set advanced properties.
You’ll also find real examples, common mistakes, and non-obvious tips that even experienced players sometimes miss. By the end, you’ll understand not just how to use the spawner command, but how to use it creatively and efficiently.
What Is A Minecraft Spawner Command?
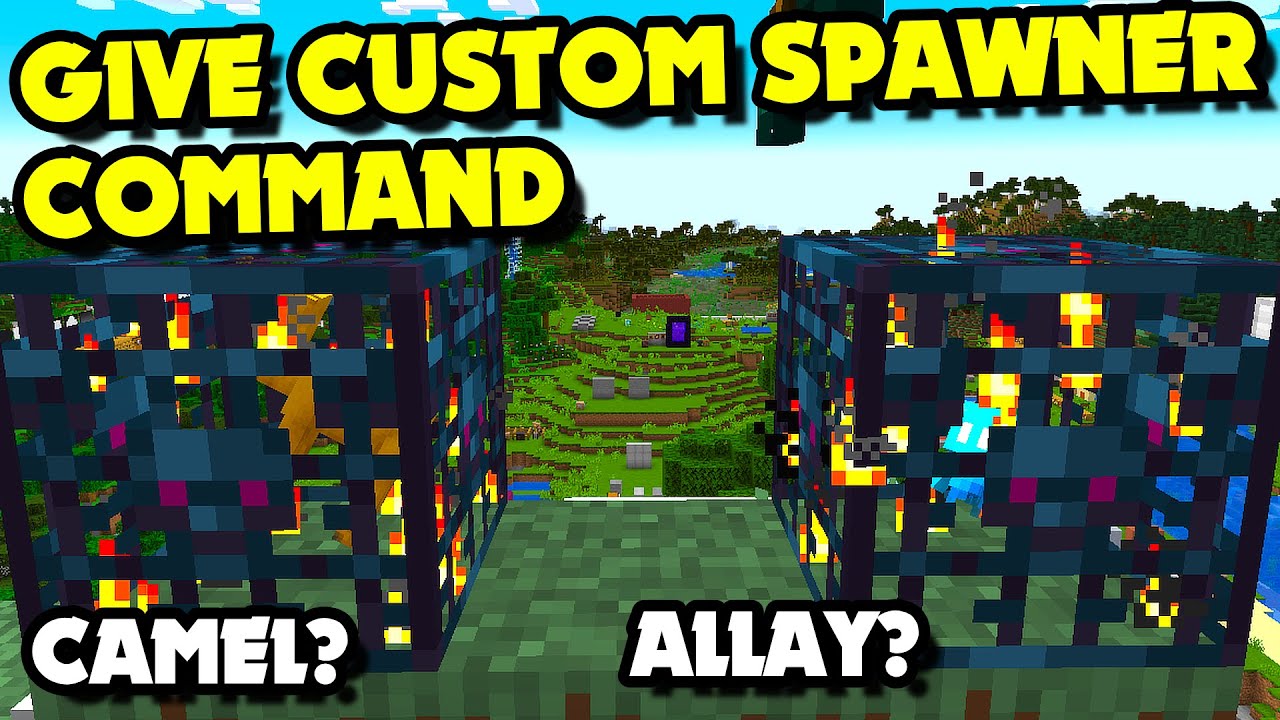
In Minecraft, a spawner is a cage-like block that creates mobs at intervals. You’ve probably seen them in dungeons or abandoned mineshafts, usually creating zombies, skeletons, or spiders. But these natural spawners are only the beginning. With commands, you can generate your own spawners anywhere, with total control over what they produce.
The spawner command refers to the process of placing a mob spawner using Minecraft’s built-in command system. In Java Edition 1.13 and later, the main command is `/setblock` with NBT data tags to specify the spawner’s details. This command lets you:
- Choose the mob type (zombie, skeleton, creeper, etc.)
- Set spawn rates and range
- Add special effects or equipment to spawned mobs
- Control spawn conditions (light, player range, etc.)
Unlike natural spawners, which only offer limited variety and are locked to specific mob types, the spawner command opens the door to custom encounters. You can even place spawners in the middle of a forest, underwater, or floating in the sky.
For creative mapmakers and server owners, this means you can design challenges, puzzles, or traps that are not possible with standard gameplay.
Understanding this command can help you build adventure maps, practice combat, or just have fun creating chaos in your world. It’s also a tool for learning how Minecraft handles mob spawning behind the scenes.
How Do Spawners Work In Minecraft?
A spawner is a block that repeatedly creates mobs near its location, following certain rules:
- The spawner checks if there are too many mobs nearby (a cap).
- It looks for a valid spot to place a new mob.
- If conditions are right, it spawns one or more mobs of its type.
- After a cooldown, it repeats the process.
Each spawner has an internal timer and will only activate when a player is close enough. This is what makes dungeons dangerous when you enter, but safe if you light them up or walk away. The spawner’s internal logic checks for light levels, available space, and sometimes block types (for certain mobs).
For example, a skeleton spawner will not create skeletons on blocks where they cannot stand.
By default, spawners appear in some structures. But with commands, you can put them anywhere—even in the air or underwater. The type of mob, spawn count, and other properties can be changed with NBT data (Named Binary Tag), which is a way Minecraft stores extra information.
This means you can have spawners that create mobs with armor, potion effects, or even riding other mobs.
Non-obvious insight: You can stack multiple spawners close together to create waves of mixed enemies, making for truly unique encounters. This is often used in custom adventure maps to keep players on their toes.
The Main Spawner Command Syntax
The basic spawner command for Minecraft Java Edition (1.13+) is:
/setblock minecraft:spawner{SpawnData:{id:"minecraft:"},SpawnCount:,SpawnRange:,Delay:}
- `
`: - `
`: The mob type (zombie, skeleton, etc. ). - `
`: How many mobs to spawn each time. - `
`: How far from the spawner mobs can appear. - `
`: Delay before spawning (20 ticks = 1 second).
Example: To place a zombie spawner at 100, 64, 100, use:
/setblock 100 64 100 minecraft:spawner{SpawnData:{id:"minecraft:zombie"}}
You can add more options in the `{}` to customize it further.
This command structure is flexible. You can leave out extra tags for a simple spawner, or stack multiple tags for detailed control. Remember, commands are case-sensitive and every bracket or quote must be correct.
Practical tip: To quickly test commands, use the tilde `~` symbol to place spawners relative to your position, such as `~ ~1 ~` for one block above you.
Essential Spawner Command Examples
Let’s look at some common ways to use the spawner command.
Zombie Spawner
/setblock ~ ~1 ~ minecraft:spawner{SpawnData:{id:"minecraft:zombie"}}
This places a zombie spawner one block above you. It’s a great way to quickly set up a basic enemy for practice or testing.
Skeleton Spawner With Custom Spawn Range
/setblock ~ ~1 ~ minecraft:spawner{SpawnData:{id:"minecraft:skeleton"},SpawnRange:8}
Spawns skeletons in a wider area. Increasing `SpawnRange` lets mobs appear further from the spawner, making it harder for players to predict where enemies will show up.
Creeper Spawner With Delay
/setblock ~ ~1 ~ minecraft:spawner{SpawnData:{id:"minecraft:creeper"},Delay:100}
Creepers spawn after a longer initial delay. This is useful for timed traps or surprise attacks after players enter an area.
Spawner With Multiple Properties
/setblock ~ ~1 ~ minecraft:spawner{SpawnData:{id:"minecraft:spider"},SpawnCount:4,SpawnRange:5,Delay:40}
Spawns four spiders at a time, up to five blocks away, every two seconds.
Pro tip: You can combine properties as needed. For instance, adding both `SpawnRange` and `SpawnCount` can make swarm battles or boss rooms much more dynamic.
Advanced Spawner Customization
Minecraft’s spawner command gets powerful when you add more tags. Here are some advanced ways to customize spawners.
Changing Mob Equipment
You can give mobs armor, weapons, or items using `ArmorItems` and `HandItems`.
/setblock ~ ~1 ~ minecraft:spawner{SpawnData:{id:"minecraft:zombie",ArmorItems:[{id:"minecraft:diamond_helmet",Count:1b}, {}, {}, {}],HandItems:[{id:"minecraft:diamond_sword",Count:1b}, {}]}}
This zombie spawns wearing a diamond helmet and holding a diamond sword. If you want the zombie to be extra tough, you can add armor to all four slots.
Extra detail: You can also enchant weapons or armor using the `tag` property, though the syntax is more complex.
Custom Mob Names
Mobs can spawn with custom names using the `CustomName` tag.
/setblock ~ ~1 ~ minecraft:spawner{SpawnData:{id:"minecraft:skeleton",CustomName:'"Sharpshooter"'}}
Skeletons will have the name “Sharpshooter” above their heads. This is useful for bosses or special enemies in a story map.
Non-obvious insight: If you use colors or formatting codes (like `§c` for red), you can make boss names stand out.
Applying Effects
You can make mobs spawn with potion effects like speed or strength.
/setblock ~ ~1 ~ minecraft:spawner{SpawnData:{id:"minecraft:spider",ActiveEffects:[{Id:1,Amplifier:1,Duration:2147483647}]}}
Spiders spawn with Speed II, lasting forever. You can stack multiple effects by adding more objects in the `ActiveEffects` array.
Example: Combine Speed and Strength for a “super” mob.
Multiple Mob Types (random Selection)
To make a spawner that randomly spawns different mobs, use the `SpawnPotentials` tag.
/setblock ~ ~1 ~ minecraft:spawner{SpawnPotentials:[{Entity:{id:"minecraft:zombie"}},{Entity:{id:"minecraft:skeleton"}}],SpawnData:{id:"minecraft:zombie"}}
Each spawn, it picks between zombies and skeletons.
Advanced tip: Add a `Weight` tag to control the chance of each mob type. For example, zombies 80% of the time, skeletons 20%.
Setting Spawn Conditions
Spawners can require certain light levels or nearby players using `MinSpawnDelay`, `MaxNearbyEntities`, and `RequiredPlayerRange`.
/setblock ~ ~1 ~ minecraft:spawner{SpawnData:{id:"minecraft:creeper"},RequiredPlayerRange:32,MaxNearbyEntities:6}
Only spawns if a player is within 32 blocks, and stops if 6 creepers are nearby.
Extra detail: You can also limit spawners to only work at night by combining with daylight sensors and redstone.
Table: Key Spawner Command Options
Here’s a quick reference for important NBT tags you can use with spawner commands:
| Tag | Purpose | Example Value |
|---|---|---|
| SpawnData | Mob type and properties | {id:”minecraft:zombie”} |
| SpawnCount | Mobs spawned per cycle | 2 |
| SpawnRange | Radius for spawning | 4 |
| Delay | Time before first spawn | 100 |
| MinSpawnDelay | Minimum ticks between spawns | 200 |
| MaxSpawnDelay | Maximum ticks between spawns | 800 |
| RequiredPlayerRange | How close a player must be | 16 |
| MaxNearbyEntities | Stop if too many mobs nearby | 6 |
Practical note: Try changing one tag at a time to see its effect in-game. This helps you learn how each setting changes mob behavior.
Different Ways To Place Spawners
There are several methods to add spawners to your world. Each method has pros and cons, depending on your needs.
Using /setblock
This is the most direct way. You specify the coordinates and NBT tags in one command. Great for precise placement and full customization.
Example: For building custom dungeons, use command blocks with /setblock to set up enemy waves as players progress.
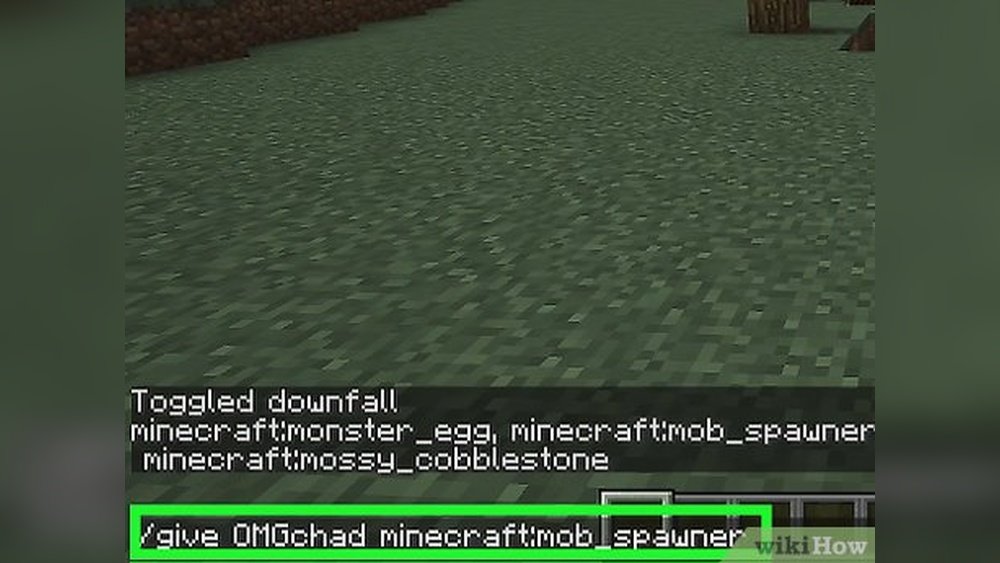
Using /give And Place
You can give yourself a spawner block, edit its NBT data, then place it. The command is:
/give @p minecraft:spawner{SpawnData:{id:"minecraft:skeleton"}}
This gives you a skeleton spawner. But in Survival mode, you can’t break or pick up spawners without Silk Touch (and even then, the mob type resets). This method works best in Creative.
Non-obvious tip: If you place a spawner in Creative and then switch to Survival, it will keep its custom properties until broken.
Using Structure Blocks
Advanced map makers sometimes use structure blocks to save and load spawners with custom settings. This is more complex but useful for big projects.
Extra detail: Structure blocks let you copy and paste entire rooms with spawners, redstone, and decorations for fast map building.
Practical Uses For Spawner Commands
Here’s how players and creators use spawner commands in real Minecraft worlds:
- Adventure Maps: Create challenging dungeons with custom mobs, bosses, or traps. For example, a boss room with a spawner that releases armored zombies.
- Practice Arenas: Set up combat practice with controlled enemy waves. Change mob types and delays for different difficulty levels.
- Farm Design: Automate resource farms by spawning specific mobs. Cow spawners for leather, or blaze spawners for blaze rods.
- Custom Events: Set up timed attacks or special events for multiplayer servers. Use redstone to turn spawners on or off for boss battles.
- Testing and Debugging: Quickly spawn any mob type to test features or mechanics. Mapmakers use this to check new traps or puzzles.
Creative idea: Combine spawner commands with teleport commands to create “boss rush” arenas where players fight waves in different rooms.
Common Mistakes And How To Avoid Them
Even experienced players often make these errors:
1. Wrong Mob Names
Mob IDs must be exact. For example, it’s `minecraft:zombie_pigman` in older versions but `minecraft:zombified_piglin` now. Always check the current version’s mob ID.
Tip: Use tab-complete in the command input to help avoid typos.
2. Syntax Errors
NBT data must use curly braces `{}` and colons `:` correctly. A misplaced comma or missing bracket will cause the command to fail.
Example: `{SpawnData:{id:”minecraft:zombie”}` is missing a closing bracket.
3. Overloading The Area
If you set `SpawnCount` or `MaxNearbyEntities` too high, the game can lag or crash. Start with small numbers.
Non-obvious mistake: Lag can also happen if mobs get stuck in small spaces. Make sure the spawn area is clear.
4. Not Using Requiredplayerrange
If this is too high, mobs might spawn far from players and wander off. Too low, and the spawner will rarely activate.
Best practice: Set `RequiredPlayerRange` to match the area you want players to fight in.
5. Forgetting Delay Settings
If `MinSpawnDelay` and `MaxSpawnDelay` are not set, spawners may act unpredictably. Match these for steady spawning.
Detail: Setting both to the same number creates a constant delay, which is great for timing challenges.
Comparison: Spawner Command Vs. Spawn Egg
Which is better for creating mobs—using a spawner command or a spawn egg? Here’s a side-by-side look:
| Feature | Spawner Command | Spawn Egg |
|---|---|---|
| Repeatable Spawning | Yes (spawns mobs repeatedly) | No (spawns once per use) |
| Custom Properties | Full NBT customization | Limited (no NBT by default) |
| Placement Control | Exact coordinates | Where player clicks |
| Redstone Control | Indirect (with block updates) | No |
| Creative Mode Needed | Yes | Yes |
| Works in Survival | No (unless cheats enabled) | No (eggs not found in Survival) |
Extra explanation: Spawn eggs are fast for single mobs, but spawner commands are best for repeated, automated, or special mobs.

Credit: www.youtube.com
How To Find Mob Ids And Nbt Tags
To use the spawner command well, you need to know mob IDs and possible NBT tags.
- Mob IDs: These are usually `minecraft:
`. Examples: `minecraft:zombie`, `minecraft:enderman`, `minecraft:slime`. - NBT Tags: These control properties like health, name, equipment, and potion effects. For a full list, see the official Minecraft Wiki.
Pro tip: Many mobs have sub-variants (like baby zombies or jockeys) which require extra tags. Check the wiki or use `/summon` with NBT first to test before making a spawner.
Extra detail: You can use `/data get entity
How Spawner Timing Works
Spawner commands use delay values to control how often mobs appear.
- `Delay`: Time (in ticks) before the first spawn.
- `MinSpawnDelay` and `MaxSpawnDelay`: Minimum and maximum time between spawns after the first. The game picks a random value between these.
- `SpawnCount`: Number of mobs per spawn.
- `MaxNearbyEntities`: If this number of mobs is already nearby, the spawner waits.
Example: A spawner with `Delay:40, MinSpawnDelay:100, MaxSpawnDelay:200, SpawnCount:2` will:
- Wait 2 seconds (40 ticks) to spawn (once placed).
- Spawn 2 mobs.
- After each spawn, wait a random time between 5 and 10 seconds (100–200 ticks) before the next.
Non-obvious detail: Setting `MinSpawnDelay` and `MaxSpawnDelay` very low (like 1 and 5) can flood an area with mobs, which is useful for testing but dangerous for gameplay.

Credit: hypixel.net
Table: Example Spawner Timing Settings
Here are sample settings for different spawner behaviors:
| Purpose | Delay | MinSpawnDelay | MaxSpawnDelay | SpawnCount |
|---|---|---|---|---|
| Fast Arena | 20 | 40 | 80 | 4 |
| Slow Dungeon | 100 | 300 | 600 | 1 |
| Burst Swarm | 5 | 10 | 20 | 8 |
Tip: Start with moderate values and adjust upward for more intense fights, or downward for relaxed areas.
How To Remove Or Edit Spawners
If you place a spawner with the wrong settings, you can:
- Remove it: Use `/setblock
air` to replace the spawner with air. - Edit it: Place a new spawner at the same spot with updated NBT data (this overwrites the old one).
- Break it: In Creative mode, just break the block. In Survival, spawners drop XP but not themselves.
Non-obvious tip: If you use `/data merge block
Example: To change a spawner at 100, 64, 100 to spawn endermen, use:
/data merge block 100 64 100 {SpawnData:{id:"minecraft:enderman"}}
This is faster than removing and re-placing spawners, especially when testing multiple setups.
Spawner Command In Bedrock Vs Java Edition
While this guide focuses on Java Edition, Bedrock Edition handles spawners differently.
- In Bedrock, you can place a spawner with `/setblock` but must use a spawn egg to set the mob type.
- Bedrock does not support NBT tags in the same way.
- For advanced spawners, Java Edition is more flexible.
Practical note: If you’re building maps for multiple platforms, design your spawner logic around the more limited Bedrock system, then enhance for Java.
If you play Bedrock, experiment with spawn eggs and command blocks for best results.
Two Non-obvious Insights For Spawner Commands
- You Can Stack SpawnPotentials for Complex Random Spawns: By adding multiple entries with different weights, you can make one spawner that rarely spawns bosses or mixes mobs for surprise encounters.
- Spawner Mobs Can Have Full AI and Drops: Mobs from spawners act just like naturally spawned mobs. If you give them special gear or effects, they’ll use them. This is great for designing mini-bosses or unique map challenges.
Extra tip: Spawner mobs can pick up items on the ground if the mob type allows. This can be used for surprise upgrades in adventure maps.
Credit: www.youtube.com
How Spawner Commands Affect Multiplayer Servers
Spawner commands are powerful tools for server admins. Here’s what to know:
- Performance: Too many custom spawners (especially with high `SpawnCount`) can lag the server.
- Game Balance: Custom spawners can make areas very dangerous or very rewarding.
- Permission Controls: On public servers, limit who can use spawner commands to prevent griefing.
Extra tip: Use command blocks with redstone to control when spawners activate, reducing lag and improving gameplay balance.
Tips For Using Spawner Commands Creatively
- Design wave arenas that get harder over time by using multiple spawners with different mobs and delays.
- Create themed dungeons: For example, a “frost cave” with strays (ice skeletons) holding bows enchanted with Frost Walker.
- Use command blocks to activate spawners only after players finish a puzzle or boss fight.
- Hide spawners behind walls or ceilings for surprise attacks.
- Combine spawners with redstone to make traps or timed events.
Creative idea: Use invisible armor stands or blocks to hide spawners, making enemy waves feel like they appear out of nowhere.
Frequently Asked Questions
What Is The Easiest Way To Place A Custom Spawner?
The simplest method is using `/setblock ~ ~1 ~ minecraft:spawner{SpawnData:{id:”minecraft:
Can You Change An Existing Spawner’s Mob Type?
Yes, you can use `/data merge block
Do Spawner Commands Work In Survival Mode?
Spawner commands require cheats to be enabled and are usually used in Creative mode. In Survival, you cannot obtain or place spawners with commands unless you have operator permissions.
How Do You Make A Spawner Spawn Bosses Like The Wither Or Ender Dragon?
You cannot make a spawner generate the Ender Dragon or Wither using commands; these mobs are not supported by spawners. For bosses, use `/summon` commands or command blocks to create them.
Are Spawner Commands Available In Bedrock Edition?
Bedrock Edition supports `/setblock` for spawners, but does not allow full NBT customization. You must use spawn eggs to set the mob type, and advanced properties are not supported.
Minecraft’s spawner command is a powerful, flexible tool for mapmakers, builders, and creative players. With a little practice and the right syntax, you can fill your world with unique challenges, custom mobs, and endless adventure. For the most up-to-date details and examples, the Minecraft Wiki is an excellent resource. Dive in, experiment, and bring your Minecraft world to life with the magic of spawner commands.