When you start playing Minecraft, your first base is more than just a shelter. It’s your home, your defense, your supply center, and your creative launchpad. Building a great base early can make your whole adventure easier and more fun. But if you’re new, it’s easy to make mistakes—like picking a bad spot or forgetting something important. With a little planning and some smart choices, your first base can help you survive the first nights and set you up for long-term success.
In this guide, you’ll learn how to choose a smart location, gather materials, design a functional layout, and protect yourself from danger. We’ll cover not just basic tips, but also deeper insights beginners often overlook. By the end, you’ll know how to build a Minecraft first base that’s safe, organized, and ready for anything.
Why Your First Base Matters
Many players rush their first shelter, but your first base shapes your Minecraft experience. It’s where you store items, sleep, craft tools, and plan. If you do it right, you’ll save time and avoid frustration later. If you do it wrong, you’ll lose items, get lost, or face constant attacks from mobs.
A strong first base means:
- You survive the first nights with less stress
- Resources and tools are always within reach
- Exploring and mining become much safer
- You have a foundation for bigger builds later
New players often miss these points because the early game feels chaotic. But a little focus at the start can make the rest of the game much easier.
Choosing The Best Location
The location of your first base is one of the most important decisions you’ll make. Here’s what you need to consider:
Proximity To Resources
Look for areas with easy access to:
- Wood: Forests or mixed biomes are ideal.
- Stone: Hills, mountains, or even surface rocks.
- Water: For farming, fishing, and safety.
- Animals: For food and materials.
Don’t build too far from your spawn point, especially if you’re new. If you die, you’ll want to find your base again quickly.
Safety From Mobs
Mobs like zombies and skeletons spawn in dark areas. Avoid building in:
- Dense forests where monsters hide under trees
- Deep caves unless you’re ready to defend yourself
- Swamps (at night, slimes and witches spawn here)
A slightly raised area or a hilltop gives you a good view and makes it harder for mobs to approach unnoticed.
Flat Ground Vs. Natural Shelter
Flat plains are easy to build on. But natural shelters like caves or overhangs can save time and provide instant protection. Some players dig into a hillside for their first base, then expand as they collect resources.
Visibility And Navigation
It’s easy to get lost, especially when exploring. Build your base somewhere visible—like near a tall tree, hill, or coastline. Place torches or a marker (a tall pillar or colored block) to help you find it from a distance.
Special Biomes
Some biomes offer unique advantages:
- Plains: Flat, lots of animals, easy to expand
- Desert: Fewer trees, but less rain and fewer mobs
- Savanna: Good mix of wood and animals
- Village proximity: Being close to a village gives you trade options and extra shelter
Gathering Essential Materials
Before you build, gather the right materials. You don’t need everything at once, but some items are critical in the first days.
Wood
Chop down trees with your hands to get logs. Craft these into planks for building and crafting. Collect at least 32 logs at the start—you’ll use them quickly.
Stone
Once you have a wooden pickaxe, mine stone for better tools and a furnace. Aim for at least 40 pieces. Cobblestone is strong and resists creeper explosions better than wood.
Coal Or Charcoal
Torches keep your base safe from monsters. If you can’t find coal, burn wood in a furnace to make charcoal.
Food
Don’t ignore food! Punch grass for seeds, collect apples from trees, or hunt animals. A small farm near your base will help you survive.
Wool
Three blocks of wool (from sheep) and three planks make a bed. A bed lets you skip the night and set your spawn point.
Bonus: Iron
If you find iron early, make a pickaxe or sword. Iron tools and armor give you a big advantage over wooden or stone gear.
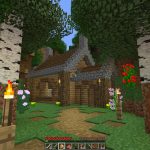
Building Your First Shelter
You have your spot and your supplies. Now it’s time to build. The goal: safe, simple, and expandable.
Size And Shape
A good starter base is:
- At least 7×7 blocks wide and 4 blocks high
- Big enough for a bed, chests, furnace, and crafting table
- Has a roof to keep out spiders and skeletons
Don’t worry about style at first. Function comes before form. You can always upgrade later.
Walls And Roof
Wooden planks are fast and easy. Stone is stronger. Dirt works in an emergency. Make sure all sides are enclosed. Use glass (from smelted sand) for windows if you want to see outside.
A common beginner mistake: leaving holes or gaps for “quick exits.” Mobs can get in through even a one-block gap!
Door And Entrance
Use a door, not a hole. Doors keep mobs out, but zombies can break wooden doors on hard mode. If you play on hard, use an iron door with a button or lever.
Add a porch or fence to stop creepers from lurking right outside your door.
Lighting
Place torches inside and outside. One torch every 7 blocks keeps the area bright enough to stop mobs from spawning. Light up the roof, too.
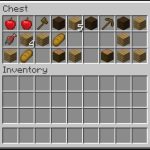
Floor And Storage
Dig out the dirt floor and replace it with wood or stone for a cleaner look. Place chests near the walls to store your items. Double chests hold more.
Bed Placement
Put your bed in a corner, away from doors and windows. If mobs are nearby, you won’t be able to sleep.
First Base Example Layout
Here’s a simple layout for a first base:
| Feature | Purpose | Location |
|---|---|---|
| Bed | Skip night, set spawn | Corner |
| Chest | Item storage | Next to wall |
| Crafting Table | Make tools/items | Near door |
| Furnace | Smelt/cook | Near chest |
| Door | Entrance/exit | Front |
You can expand or change this layout as you find more resources.
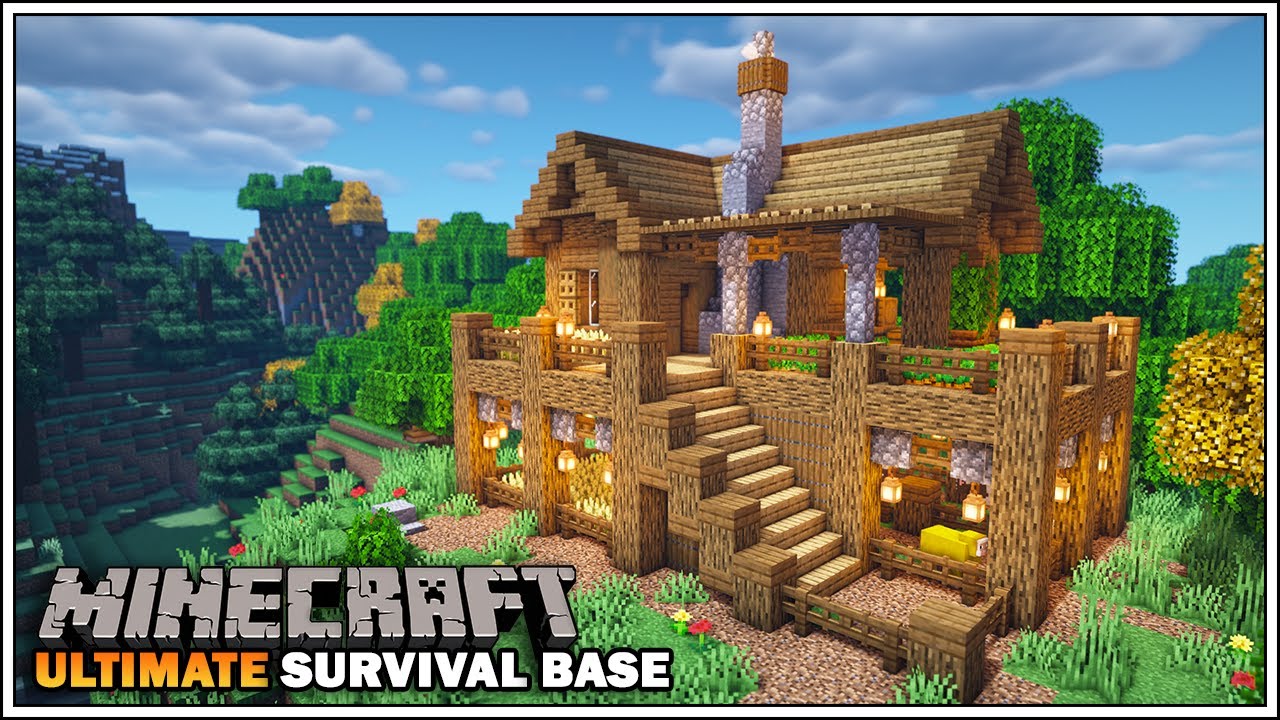
Expanding And Upgrading Your Base
Once you survive your first nights, you’ll want to expand. Here’s how to make your base more useful and comfortable.
Add Extra Rooms
- Storage room: Build a separate area for more chests. Organize by item type (minerals, tools, food).
- Farming room: An indoor or rooftop farm keeps you fed and safe.
- Mine entrance: Dig a staircase or shaft inside your base for safe mining.
Improve Security
- Build a fence or wall around your base to keep mobs away.
- Add a moat or water barrier for extra protection.
- Place more torches outside, or use lanterns for better light.
Upgrade Materials
- Replace wood with stone, brick, or concrete for more durability.
- Use glass panes for better windows.
- Upgrade doors and add trapdoors or iron bars for style and safety.
Redstone Features
If you find redstone, try simple features:
- Secret doors
- Automatic doors with pressure plates
- Trap chests for pranks or protection
Many new players overlook redstone, but even basic circuits can make life easier.
Build Above And Below
- Add a second story for more space or a lookout tower.
- Dig a basement for secure storage or potion brewing.
Personalize Your Space
As you get more resources, decorate your base with:
- Paintings
- Carpets
- Flower pots
- Banners
Personal touches make your base feel like home.
Organizing Your Items
Keeping your items organized saves time and reduces mistakes. Here are some tips:
Use Multiple Chests
Don’t put everything in one chest. Use several, labeled with signs or item frames:
- Blocks and building materials
- Ores and minerals
- Food and farming
- Tools and weapons
- Mob drops (bones, string, etc.)
Smart Storage Layout
Place your main storage near the entrance or crafting table. Rare items (diamonds, enchanted gear) can go in a hidden or locked chest.
Item Sorting Table
Here’s an example layout for chest organization:
| Chest Label | Main Items | Location Suggestion |
|---|---|---|
| Building Blocks | Stone, wood, glass | Near main room |
| Ores & Minerals | Iron, coal, diamonds | Near furnace |
| Food | Meat, bread, seeds | Near farm/kitchen |
| Tools & Weapons | Pickaxes, swords | Near door |
| Mob Drops | String, bones, gunpowder | Extra room |
Avoiding Common Storage Mistakes
- Don’t leave valuables in your inventory when exploring
- Don’t mix random items in one chest—it’s hard to find things later
- Don’t forget to lock or hide rare items if playing multiplayer
Organized storage helps you craft faster and avoid losing important gear.
Credit: www.youtube.com
Defending Your Base
Even a simple base can be well-defended. Here’s how to stay safe from mobs and other players.
Lighting
The single most important defense is good lighting. Place torches everywhere—inside, outside, on the roof, and around your fences.
Walls And Fences
A fence two blocks high stops most mobs. Add gates for easy entry and exit. Cobblestone or brick walls are even stronger.
Traps And Moats
Dig a shallow trench around your base and fill it with water or lava (be careful with lava!). Simple traps like pits with spikes or cactus can stop zombies and skeletons.
Doors And Windows
Iron doors are stronger than wood. Use levers or buttons so mobs can’t open them. Glass panes let you see outside without risk.
Emergency Escape
Have a backup exit—like a trapdoor leading to a tunnel. If creepers or pillagers surround your base, you’ll need another way out.
Defending In Multiplayer
If you play on a server, hide your entrance or add traps for griefers. Use obsidian or ender chests for your most valuable items.
Power-ups: Farms And Automation
A basic farm keeps you alive, but simple automation can give you a big edge. Here’s how to get started:
Growing Food
Plant wheat, carrots, or potatoes near your base. Use a hoe to till the ground, plant seeds, and keep water close for faster growth.
Simple Animal Pens
Build fenced areas for cows, sheep, or chickens. Animals provide food, wool, and leather.
Auto-farming Basics
With a little redstone, you can automate some farming:
- Use water buckets and pistons to harvest crops
- Build a chicken coop with a hopper to collect eggs
- Set up a composter to turn extra plants into bonemeal
New players often skip automation, but it saves time and makes survival easier.
Infinite Water Source
Dig a 2×2 square, fill two opposite corners with water, and you’ll have unlimited water. This helps with farming, brewing, and emergencies.
Exploring Safely From Your Base
Your base is your home—but you need to explore to progress. Here’s how to do it safely:
Marking Your Base
Build a tall pillar or beacon so you can see your base from far away. Use bright blocks (wool, concrete) or torches at the top.
Carrying Essentials
Always take:
- Map or compass (if you have one)
- Food and torches
- Sword and pickaxe
- Blocks for climbing or blocking mobs
Leave valuables behind in case you die.
Setting Waypoints
If you travel far, place torches, signs, or markers along the path back to your base. This prevents getting lost.
Building Outposts
For long trips, build small outposts with a bed and chest. This gives you a safe spot to rest and store items before returning home.
Managing Risk
Don’t explore at night unless you have armor. Avoid dangerous biomes (like swamps or jungles) until you’re better equipped.
Common Mistakes To Avoid
Many new players make mistakes with their first base. Here are some to watch out for:
- Building too small: You’ll run out of space quickly.
- Forgetting a bed: If you die, you’ll respawn far from your base.
- Poor lighting: Mobs spawn inside and attack.
- Bad location: Too far from resources or spawn point.
- No storage plan: Items get lost or mixed up.
- One entrance only: No escape if mobs attack.
- No farm: You run out of food quickly.
- Ignoring upgrades: Sticking to dirt or wood when you have better materials.
- No roof: Spiders or skeletons can attack from above.
- No markers: Easy to get lost while exploring.
Avoiding these mistakes helps your base stay safe and useful as you play.

Credit: www.reddit.com
Example: A Day-one First Base Walkthrough
Let’s walk through building a first base step-by-step:
- Spawn and gather wood: Chop down at least 8 logs.
- Craft tools: Make a crafting table, then a wooden pickaxe.
- Mine stone: Get at least 20 cobblestone for tools and a furnace.
- Hunt or farm food: Kill a few animals or punch grass for seeds.
- Find a base spot: Look for a hill or plain near trees and water.
- Build your shelter: Use wood or stone to make a 7x7x4 box.
- Place a door and torches: Craft and place these before sunset.
- Add a bed: If you have wool, craft and place a bed.
- Store items: Place a chest and keep extra tools and food inside.
- Light up surroundings: Place torches outside and on the roof.
By nightfall, you’ll have a safe, simple base that covers all your needs.
Advanced Tips For Your First Base
If you want to go further, try these advanced tricks:
- Use scaffolding for easy building and repairs.
- Map your base with banners for better navigation.
- Build underground farms for safety and style.
- Add a nether portal room once you have obsidian.
- Create a fishing dock for easy food and treasures.
- Use colored blocks or banners to mark rooms or storage.
Many players wait too long to upgrade. Start early and your base will always feel fresh and useful.
Data Comparison: Wood Vs. Stone Vs. Dirt Bases
Which material is best for your first base? Here’s a quick comparison:
| Material | Strength | Resource Availability | Best Use |
|---|---|---|---|
| Wood | Medium | Very High | Early game, fast builds |
| Stone | High | High | Defensive, durable bases |
| Dirt | Low | Very High | Emergency shelter |
Stone is usually the best upgrade as soon as you can mine it.
Inspiration: Creative First Base Ideas
Your base doesn’t have to be a boring box. Here are creative ideas:
- Treehouse: Build high in the trees for safety and a great view.
- Underground bunker: Dig down for hidden security.
- Cliffside home: Build into a mountain for style and defense.
- Floating island: Use water or blocks to build above ground level.
- Village house: Expand or improve a villager’s home.
Look for inspiration from YouTube or Reddit builds. You’ll find many unique designs. For more ideas, check the Minecraft Wiki shelter tutorials.

Credit: www.reddit.com
Frequently Asked Questions
How Do I Find My First Base Again If I Get Lost?
If you get lost, look for landmarks like hills, unique trees, or your torch markers. Building a tall pillar or using bright blocks helps. You can also use a map or compass. In worst cases, retrace your path by following the sun (it rises in the east, sets in the west).
What Should I Build First In My Base?
Start with a basic shelter, a bed, and a chest. Add a crafting table and furnace. Place torches to prevent monsters from spawning. Once you have these, you can focus on storage, farming, and security upgrades.
How Do I Keep Creepers From Blowing Up My Base?
Build a fence or wall around your base. Light up the area so creepers don’t spawn nearby. Keep your base made from stone or other strong materials, as these are less damaged by explosions. Always watch for creepers when you leave or return to your base.
Is It Better To Build Underground Or Above Ground?
Both have advantages. Underground bases are hidden and safe from most mobs, but can be harder to expand and decorate. Above-ground bases are easier to find, expand, and personalize, but need more defense. Many players combine both: a surface home with underground storage or mining.
Can I Move My Base Later In The Game?
Yes, you can move anytime. Pack your items into chests, break and carry them, and rebuild in a new spot. Many players build bigger, better bases as they get more resources. Use your first base as a learning experience for later builds.
Your first base in Minecraft is the heart of your adventure. Take time to plan, build smart, and stay safe. With these tips, you’ll survive your first nights and build a world you’re proud of.