Want to make your Canva designs truly stand out? Using your own unique fonts can add that personal touch and elevate your brand’s style instantly.
But how do you get your favorite fonts into Canva? If you’ve ever wondered how to upload a font to Canva, you’re in the right place. This guide will walk you through every simple step to upload custom fonts quickly and start using them in your designs right away.
Ready to unlock new creative possibilities? Let’s dive in!

Credit: louisem.com
Canva Font Upload Requirements
Uploading a font to Canva requires meeting specific rules. These rules ensure your font works well and respects copyright laws. Knowing these requirements helps you add fonts smoothly.
Fonts must be in the correct format. Your account type affects font upload access. You must also verify you have the right to use the font.
Supported Font Formats
Canva supports three font formats for upload. These are OpenType (.otf), TrueType (.ttf), and Web Open Font Format (.woff). Make sure your font file uses one of these formats. Other formats will not upload successfully. Using supported formats keeps your font clear and sharp in designs.
License Verification
Canva asks you to confirm font usage rights before upload. You must own the font or have a license to use it. Uploading fonts without permission can cause legal issues. Always check the font license before uploading. This step protects you and Canva from copyright claims.
Account Type Needed
Only Canva Pro, Canva for Teams, Canva for Education, and Canva for Nonprofits accounts can upload fonts. Free accounts cannot add custom fonts. If you want to upload fonts, upgrade your account. This feature helps brands keep their style consistent.
Credit: www.youtube.com
Accessing Brand Kit In Canva
Accessing the Brand Kit in Canva is the first step to upload your custom fonts. This feature helps keep your brand fonts, colors, and logos organized. It is available to Canva Pro users, giving you more control over your designs.
Knowing how to find and use the Brand Kit saves time. It makes font uploading quick and easy. Follow the steps below to access it smoothly.
Navigating To Brand Section
Start at the Canva homepage after logging in. Look for the menu icon on the left side. Click on the menu to open a list of options. Find and select the “Brand” option from this list. This action takes you to the Brand section where you manage brand assets.
Selecting Your Brand Kit
Inside the Brand section, you will see your Brand Kits. Choose the Brand Kit you want to use or edit. Each kit holds your fonts, colors, and logos for a specific brand or project. Clicking on a Brand Kit opens its settings. Here, you find the fonts area to upload your custom font files.
Uploading Fonts On Desktop
Uploading fonts on a desktop in Canva allows you to personalize your designs with unique typography. This process is straightforward and quick. You only need a Canva Pro account to add custom fonts. Once uploaded, your fonts become available across all your designs on that device.
Follow simple steps to upload a font from your computer. Keep your font files ready in supported formats like .otf, .ttf, or .woff. Uploading fonts enhances your branding and design consistency.
Selecting Upload Font Option
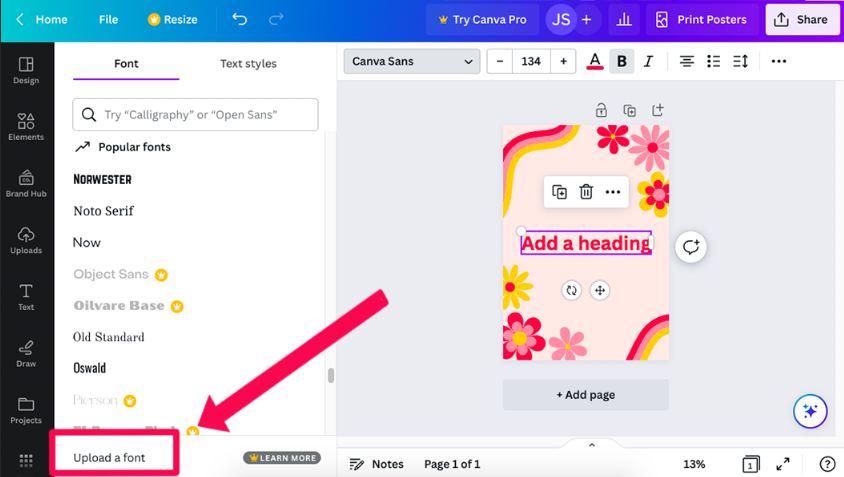
Start by opening Canva on your desktop and logging in. On the homepage, find the menu icon at the top left. Click on it to open more options. Select the “Brand” section from the menu. Here, choose your Brand Kit or create one if you don’t have it yet. Scroll down to the Fonts area. Look for the “Upload a font” button and click it. This opens a window to add font files from your computer.
Choosing Font Files
After selecting “Upload a font,” a file dialog box appears. Navigate to the folder where your font files are saved. Pick the font file you want to upload. Ensure it is in a supported format like OpenType (.otf), TrueType (.ttf), or Web Open Font Format (.woff). Select the file and click “Open” to start uploading. Canva will ask if you have the right to use the font. Click “Yes, upload away!” to confirm. The font now appears in your Brand Kit fonts list. Use it freely in your designs.
Uploading Fonts On Mobile
Uploading fonts on mobile devices allows you to personalize your Canva designs anytime, anywhere. The process is simple but requires a few clear steps to ensure your font uploads correctly. Mobile uploads offer convenience for quick edits or creative projects on the go.
Using the Canva app on your phone or tablet, you can add custom fonts directly from your device. This feature is especially useful for users who prefer working on mobile rather than desktop.
Using Canva App For Upload
Open the Canva app on your mobile device. Tap the menu icon, usually found in the top left corner. Go to the Brand Kit section, which holds your fonts and brand assets. Select the font area, then tap Upload a font. Choose your font file from your phone’s storage. The app supports .otf, .ttf, and .woff files. After selecting the file, confirm the upload by agreeing to the license terms. The new font will appear in your font list for use in any design.
Tips For Mobile Uploads
- Ensure your font file is saved on your phone or accessible via cloud storage apps.
- Use a stable internet connection to avoid upload interruptions.
- Confirm you have the legal rights to use the font to prevent copyright issues.
- Keep the Canva app updated to access the latest font upload features.
- Restart the app if the font does not show immediately after uploading.
- Font uploads require a Canva Pro account; verify your subscription before starting.
Using Uploaded Fonts In Designs
Using uploaded fonts in your Canva designs lets you keep your branding consistent. Custom fonts help your projects stand out and match your style exactly. After uploading a font, you can easily use it in any design. This section explains how to add text boxes and select your uploaded fonts.
Adding Text Boxes
Start by opening your Canva design. Look for the “Text” option in the left toolbar. Click it to see text box choices. Choose a style or click “Add a text box” to insert plain text. The text box will appear on your design canvas. You can move or resize it as needed. Click inside the box to type your text. This is where your uploaded font will be applied.
Selecting Uploaded Fonts
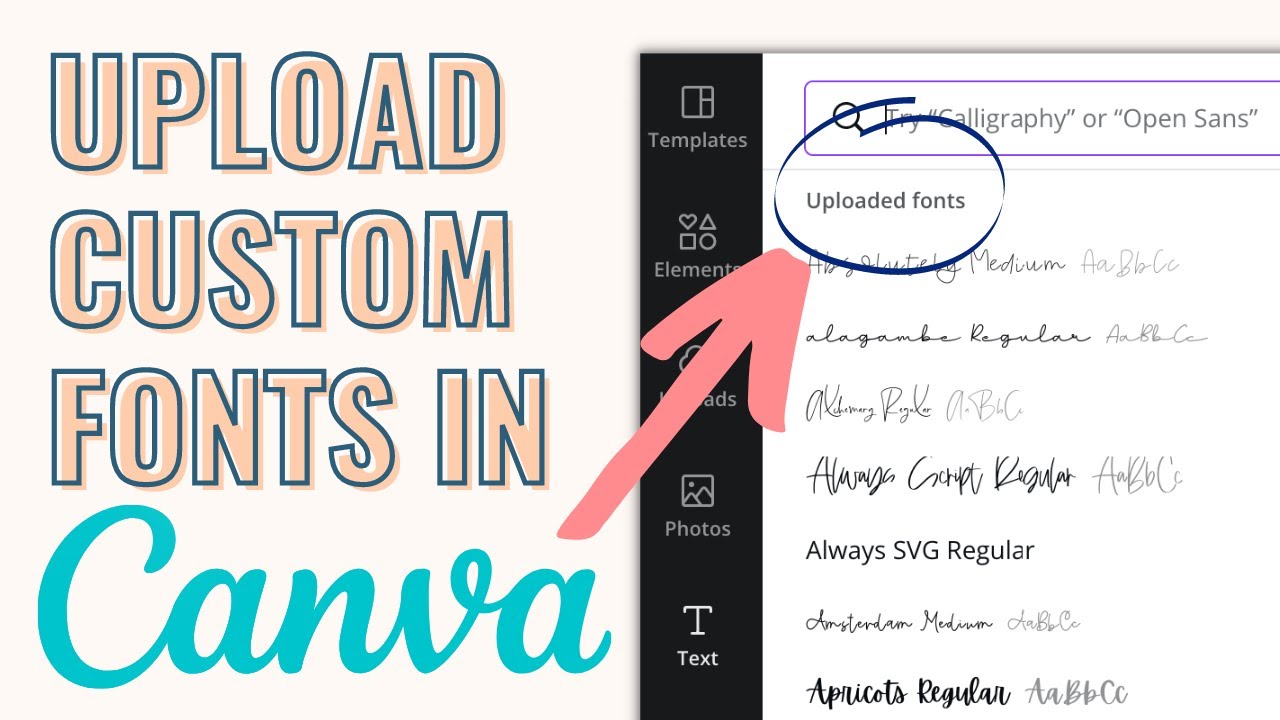
Click on the text box to select it. Then go to the font dropdown menu at the top toolbar. Scroll through the list of fonts until you find the “Uploaded fonts” section. Your newly uploaded fonts will appear here. Click the font name to apply it to your selected text. The text instantly changes to the new font style. This process works for any text box in your design. Keep your custom fonts ready for use anytime.
Troubleshooting Upload Issues
Uploading fonts to Canva can sometimes cause issues. These problems might stop your font from appearing or uploading correctly. Troubleshooting upload issues helps solve these problems quickly. Understanding common errors and their fixes saves time and frustration.
Common Errors
One common error is unsupported font formats. Canva only accepts .otf, .ttf, and .woff files. Uploading other formats will fail.
Another issue is lacking a Canva Pro account. Font uploads are only available for Pro users.
Sometimes, upload errors happen because of slow or unstable internet connections. This interrupts the file transfer.
Font licensing restrictions can also block uploads. Fonts must be licensed for personal or commercial use.
How To Fix Them
Check your font file format first. Convert it to .ttf or .otf if needed. Many free tools online can help with conversion.
Verify your Canva subscription. Only Pro accounts support font uploads. Upgrade if necessary.
Use a strong and stable internet connection. This ensures smooth uploading without interruptions.
Review the font license carefully. Upload only fonts you have permission to use. This avoids legal issues.
Font Licensing Tips
Uploading custom fonts to Canva can make your designs unique and personal. Before adding fonts, understanding font licensing is important. This ensures legal and safe use of fonts in your projects.
Fonts often come with specific rules about how they can be used. Some fonts are free for personal use but require payment for commercial use. Others may not allow modifications or redistribution. Checking these details helps avoid problems later.
Checking Font Permissions
Always read the font license before uploading it to Canva. Look for terms about commercial use and distribution. Confirm that the license allows uploading the font to design platforms. If unclear, contact the font creator or seller for permission.
Use fonts from trusted sources to ensure proper licensing. Free font websites often list the license type clearly. Paid fonts usually come with detailed usage rights. Keep a copy of the license as proof of permission.
Avoiding Legal Issues
Uploading fonts without the right license can cause legal trouble. Canva may remove fonts that violate copyright rules. This can disrupt your projects and design flow. Using unlicensed fonts risks fines and claims from font owners.
Stick to fonts you own or have permission to use. Avoid sharing font files from unknown sources. Always confirm that your font use matches the license terms. This protects your work and respects font creators.
Managing Uploaded Fonts
Managing uploaded fonts in Canva keeps your projects neat and efficient. You can organize your fonts to find them quickly. Removing unused fonts helps keep your workspace clean. Canva allows easy editing of your font list to suit your needs.
Editing Font Lists
Open your Brand Kit to see all uploaded fonts. You can rename fonts for easier identification. Drag fonts to reorder them by preference. Group fonts that you use often for quick access. Editing your font list saves time during design.
Deleting Unused Fonts
Remove fonts that you no longer need from your Brand Kit. Select the font and click the delete option. Confirm deletion to free up space in your font list. Clearing unused fonts helps avoid clutter. It also improves your workflow by showing only relevant fonts.
Combining Fonts For Stunning Designs
Combining fonts effectively creates eye-catching and professional designs. Using multiple fonts can add personality and clarity. It helps highlight important text and guides the viewer’s eye. Good font combinations balance contrast and harmony. This section explains how to pair fonts and keep your design consistent.
Pairing Fonts Effectively
Choose fonts that complement each other well. Pair a bold font with a simple one for contrast. Avoid using fonts that are too similar or too different. Select one font for headings and another for body text. Limit your design to two or three fonts to keep it clean. Use serif fonts with sans-serif fonts for a classic look. Check that fonts share a similar mood or style. Test your font pairings by creating sample text blocks.
Maintaining Design Consistency
Use your chosen fonts consistently across all design elements. Set clear rules for font sizes and weights. Apply the same font styles for headings, subheadings, and body text. Keep spacing uniform to create a neat layout. Avoid mixing fonts in small areas to prevent clutter. Align text elements properly to improve readability. Use your brand’s colors and fonts in every design. Consistency builds trust and strengthens your visual identity.
Best Practices For Font Uploads
Uploading custom fonts to Canva enhances your design projects. Following best practices keeps your font uploads smooth and efficient. Proper handling avoids errors and saves time. This section covers key tips for font uploads.
Optimizing File Sizes
Large font files slow down Canva and your computer. Compress fonts before uploading to reduce file size. Use tools like Font Squirrel or Transfonter for optimization. Smaller files load faster and improve design performance. Avoid uploading multiple versions of the same font.
Keeping Fonts Organized
Create a dedicated folder for your font files on your device. Name fonts clearly to find them quickly later. Separate fonts by style or project for easy access. Remove unused or duplicate fonts regularly to keep your library clean. This practice saves time and keeps Canva tidy.
Credit: shotkit.com
Frequently Asked Questions
Can You Import Fonts Into Canva?
Yes, Canva Pro users can import fonts by uploading. otf,. ttf, or. woff files in the Brand Kit’s Fonts section.
How Do I Import A Font?
To import a font, open your design tool’s font or brand section. Click “Upload font,” select the font file (. otf,. ttf,. woff), and confirm the upload. Ensure you have the font license and use a supported format for successful importing.
Why Are My Downloaded Fonts Not Showing Up In Canva?
Downloaded fonts may not show in Canva if you lack a Canva Pro account or the font file isn’t supported (. otf,. ttf,. woff). Ensure you upload fonts via the Brand Kit and confirm proper licensing. Check file format and upload status to use fonts in your designs.
How To Copy A Font Style In Canva?
To copy a font style in Canva, select the text, click the “Style” icon, then click “Copy Style. ” Next, select another text box and click “Paste Style. ” This duplicates the font style instantly across your design.
Can I Upload My Own Fonts To Canva?
Yes, Canva Pro users can upload custom fonts in. otf,. ttf, or. woff formats.
What File Types Does Canva Accept For Font Uploads?
Canva supports OpenType (. otf), TrueType (. ttf), and Web Open Font Format (. woff).
Do I Need A Canva Pro Account To Upload Fonts?
Uploading fonts requires a Canva Pro subscription or higher.
How Do I Upload A Font To Canva Step-by-step?
Go to Menu > Brand > Brand Kit > Add new font > Choose file > Upload.
Can I Use Uploaded Fonts In Any Canva Design?
Yes, once uploaded, fonts are available in all your Canva designs.
Are There Any Licensing Rules For Font Uploads?
You must have proper license rights to use and upload the font legally.
Conclusion
Uploading a font to Canva is simple and quick. Just follow the steps carefully to avoid mistakes. Remember to check your font’s license before uploading. Use supported formats like. otf,. ttf, or. woff for smooth upload. Once added, your font stays ready for any design project.
This lets you personalize your work easily. Enjoy creating unique designs with your own fonts in Canva!